In my thousands of interactions with tourists and aurora chasers online, discussions of the aurora’s color are evergreen, and they usually take two sides. Either the aurora is completely “photoshopped” in images and actually has no color at all, or the aurora is as green as it appears in photos taken with professional cameras. Knowing what the aurora actually looks like is important so you have realistic expectations going into your next arctic adventure. Does the aurora really appear with all the glorious colors as seen in the photos? Maybe the aurora has no color at all? Or, as you can probably guess, maybe the answer is somewhere in-between and depends on many factors… Let’s explore the experience of viewing the aurora and set the record straight. What does the aurora really look like?

Naked eye representation of how I see the aurora.
What does the aurora look like to the human eye?

Over millions of years, the human eye has adapted to help explore the world’s wide range of light levels to contain specialized cells called rods and cones in the retina, the back of the eye. These rods and cones interpret light differently than the pixels on a camera sensor, and are responsible for the complex ways in which we interpret color in low light and thus, the color of the aurora.

Your eyes are made up of tiny light-sensitive cells called rods and cones.
Rods are cylindrical shaped photoreceptors. They are more numerous than cone cells, with an estimated 92 million rod cells located in the human retina. They function best in low intensity light and are thus responsible for vision in dimly lit surroundings, such as at dusk. They are more than 1,000 times more sensitive to light than cones. Rods have another quirk - they are not sensitive to red light! This is why people who need to maintain “night vision” (aurora chasers) use red lights at night.
Cones are conical shaped cells that activate under bright light and are responsible for processing color. The eye has about 6-7 million cones, concentrated at the center of the retina called the “fovea” that helps with seeing details. There are three types of cones, each of which responds to the three primary colors of light: red, green, and blue. Rodes and cones are specialized types of neuroepithelial cell that is capable of absorbing light and converting it into an electrical signal. The way the brain combines signals from each type of cone allows you to see a full spectrum of colors. Different people with typical color vision can have different proportions of cone types, which means it is normal for different people to see different amounts of color in the aurora in different ways. So, yes, your “green” aurora may not be the same as my “green.”

Color blindness can happen when one or more of the color cone cells are absent, not working, or detect a different color than normal. Severe color blindness occurs when all three cone cells are absent. Mild color blindness happens when all three cone cell types are present but one type does not work right. Many of my aurora chasing friends have minor color blindness which makes it hard for them to see any color in the aurora unless the display is bright and strong.

With age, there is a gradual decrease in the number of rods and cones in the retina. Additionally, the remaining cells may become less sensitive to light, reducing their functionality. This is why people of different ages can often detect different amounts of color in the aurora. For example, when looking at the exact same aurora one night, my older friend (aged 65) was unable to see any color whereas I was able to make out a bright green.
In bright ambient light, cones take over, rods are less active, and color vision dominates. In very low light, cones enter a sort of "standby" mode and the eyes see only in black and white using rods. Cones activate in fractions of seconds, while rods can take up to 40 minutes to fully activate. At around twilight light levels (or during a full moon at night), they work together, and it is possible to see dim colors.
So what does this mean for aurora viewing?

Naked eye representation of how I see the aurora.
Seeing color in an aurora has to do with the ways your rods and cones are activated. If an aurora is strong and gives off enough light to activate your cones, you will see colors. During auroral substorms, the aurora can brighten by many factors in a matter of minutes, causing your cones to activate and colors to become visible. During weaker displays, the aurora may be visible with both rods and cones and appear grayish-green, or with rods only and appear completely gray.
Can light pollution enhance colors in the aurora?
Cones activate with enough ambient light in the environment, and the artificial brightness of light pollution is one example. Dim aurora is often “washed out” by light from towns and cities, but during intense storms, I have found its colors can appear easier to see when combined with light pollution. The overall amount and detail of aurora you can see is much lower in bright locations, but the color may appear more vibrant! For chasers at lower latitudes viewing aurora to the horizon, you will likely want to avoid any light pollution since displays are typically dimmer there than under the auroral oval. At higher latitudes, brighter, overhead displays can sometimes be seen easily in downtown areas.
Can you “hack” your eyes to see more colors?
If you’re okay with ruining your night vision for a few minutes, there’s a trick you can do to “hack” your eyes to see more colors. Shine a flashlight underneath your eyes (point it at your mouth) for a few seconds, activating your eyes’ cones. Turn off the light and stare at the aurora. For a few moments, you should be able to see the green in the aurora before your cones deactivate.
Also, it should be said again that everyone sees colors slightly differently, and trying to see colors in low light is an extreme condition for our eyes, so these differences in perception can be exacerbated. Our ability to see color at night also deteriorates as we age and is hindered even if you have minor color blindness.
Full credit to my friend Andy Witteman for showing me this trick once up in Alaska! It really works! Follow Andy on Instagram here.
Mid latitudes vs. high latitude aurora
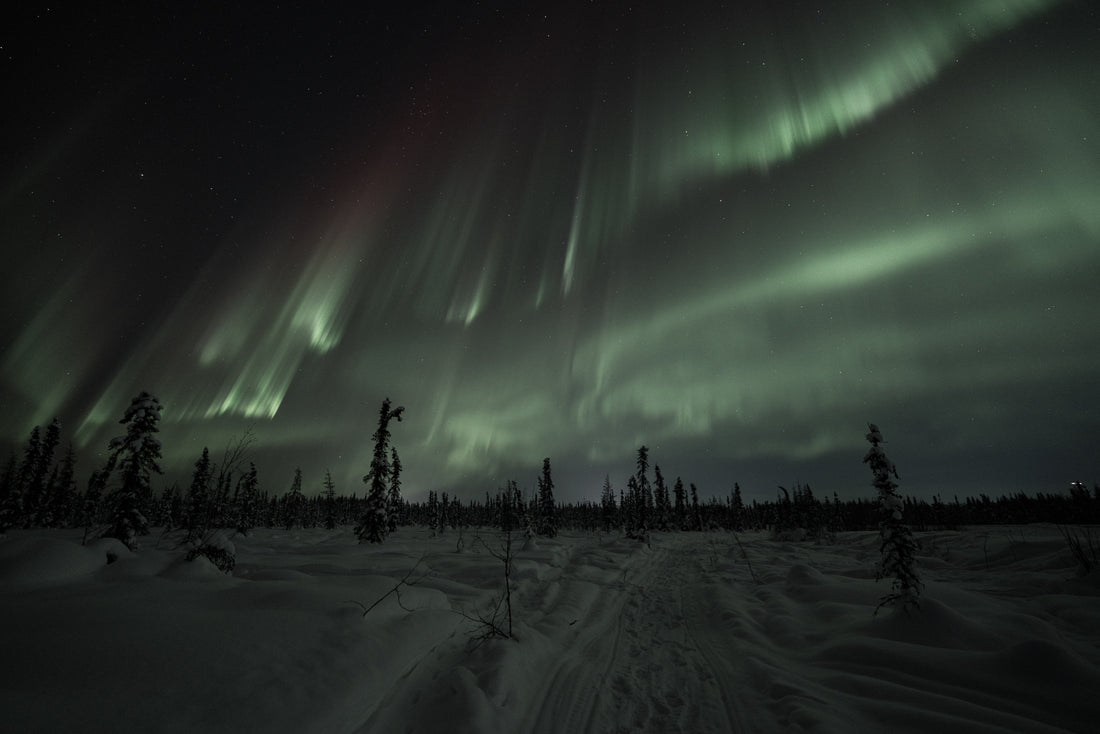
In discussions surrounding the visibility of aurora, it's important to distinguish the limitations of mid-latitude auroral displays. You see, in my interactions with aurora chasers, those who say they have never seen color in the aurora usually have one thing in common: they have only chased mid-latitude arurora shows with diffuse aurora. In these situations, the aurora is usually dominated by pulsating or diffuse aurora which is many times fainter than the discrete arcs you can see overhead in places like Alaska, Iceland, or Norway.
During large geomagnetic storms, lower latitude viewers may only see high-altitude reds and diffuse aurora extended equatorward of the main auroral oval. In these cases, colors will be hard to see with your eye but more easily visible on camera. This is where a lot of the confusion and frustration comes from, especially if these chasers are experiencing the aurora for the first time - diffuse aurora usually can't get bright enough to see colors with the naked eye.
During exceptional events, it may be possible to see colors even in diffuse aurora. For example, during the extreme geomagnetic storm of May 10/11, 2024, the red tops of the aurora were enhanced due to a huge amount of low-energy electrons raining down into our atmosphere. During the peak of the storm, this "Great Red Aurora" could be seen in places like Texas, Florida, northern Australia, and southern Europe. In many cases the red emission was bright enough to be seen with the naked eye. These Great Red Auroras are a unique, stormtime phenomenon at mid to low latitudes. Some of the great historical geomagnetic storms were recorded to these intense red auroras (e.g., Shiokawa et al. 2013).

Similarly, faint horizon glows during less active times may only appear white or with a faint green tinge. During substorms, a thin band of pink may appear as particles penetrate further into the atmosphere and exicte diatomic nitrogen (N2), which emits a pink color. This pink color can be skewed to more orange or yellow hues due to dust and haze from the atmosphere. This is the same dust that turns the sun orange as it sets and rises.

Aurora during the May 10-11 geomagnetic storms. Photo taken in southwestern British Columbia. Credit: NASA/ Mara Johnson-Groh.
So, if you have only chased aurora in places like Minnesota, North Dakota, Michigan, or any other "mid-latitude" area, keep in mind that even during strong geomagnetic storms, the aurora looks very different than typical formations at high-latitudes.
It is nearly impossible to form the same bright, colorful discrete auroral arcs overhead in these areas as what typically occurs in places like Alaska, Norway, Churchill, Tromsø, Iceland, or any other location under the quiet auroral oval. I recommend everyone see the aurora from one of these locations. In many cases, it can be a more colorful experience.
What about the moon phase?

Camera view of the aurora in Fairbanks, Alaska.
Just like light pollution can provide ambient light in the sky to activate more of your cone cells, the moon can enhance colors in the aurora. While you may lose details in the aurora’s structure, a bright moon in the sky can make it easier to see green hues, especially during quieter displays. Reds, purples, and blues can sometimes only be seen if there is some sort of moon in the sky since those emissions are dimmer than green aurora (typically by a factor of 5-10). In fact, of the four or five times I have seen red aurora (visibly with my eye) every time was under a first-quarter or full moon. Under new moon conditions, while the aurora has more contrast, you won’t make out colors until the aurora gets bright. This happens usually during substorm expansion phases which last only 10-15 minutes (find out how to predict substorms in my blog article about the GOES magnetometers). A full moon can certainly enhance the experience of seeing the aurora and fully capturing the wonderful colors that are normally invisible.
How does the aurora look like to a camera?
How A Camera Works

Schematic of how a DSLR camera works.
Let me quickly recap how cameras create images. This explanation will only cover digital cameras (DSLR and mirrorless).
Light from the aurora enters through the front of the camera’s lens. The light first passes through an opening in the lens called the aperture. The lens’ aperture controls how much light passes inside to the camera body and determines how much light the sensor receives. After the aperture, the light passes through a number of concave and convex glass and/or plastic lenses. The purpose of these lenses is to focus the light rays onto the image sensor.
A camera has three main settings the user can control: shutter speed, aperture, and ISO.
- Shutter speed is the duration that a camera sensor is exposed to light. A longer shutter speed means the sensor is collecting more light, while a shorter shutter speed means the camera receives less light. For aurora photography, shutter speeds around 5-20 seconds are most commonly used. The exact shutter speed that is best to use will depend on how bright and active the aurora is. Brighter and faster-moving auroras will require less exposure time, so a shutter speed of 5 seconds (or even less) may work well to make the resulting image bright enough. Very faint aurora may require a shutter speed as long as 20 or even 30 seconds. It is also beneficial to use a shorter shutter speed during more active displays so that features and details in the aurora don’t get smeared out.

- Aperture is the size of the hole inside the lens through which light can enter and illuminate the camera sensor. Larger apertures let in more light while smaller apertures let in less light. The “f-number” of a lens indicates how large this opening is. Lower f-numbers correspond to larger openings, and an f-number below 2.8 is ideal for low light photography, including auroras. When taking photos of the aurora, use your lens’ widest aperture setting (lowest f-number). Make sure to remember the inverse relationship between the size of the lens’ aperture and the value of the f-number.

- ISO is a complicated concept, and I suggest you read my dedicated blog article on ISO first, but for our purposes, we can call it an “amplification setting” which brightens the light after it has been collected by the camera. Adjusting the ISO on your camera functions similarly to adjusting the exposure slider when you edit your photo. For aurora photography, after you have adjusted aperture and shutter speed, set your ISO to a value that makes the image look bright enough. Typical values are anywhere between 400 (full moon) to 8,000 (new moon and weak aurora) and will depend on your other settings. You should adjust your ISO until no shadows or highlights are clipped. You can check this is the case using the histogram feature on your camera’s live preview and looking for extreme black or white areas that are pushed towards the edges of the graph. For overexposed highlights, decrease ISO, and similarly, for underexpose shadows, increase ISO.

Cameras and Eyes: Similarities and Differences
Cameras and eyes are the same, but… different. The rods and cones in our eyes are like tiny camera sensors; they receive light and send signals to our brain that uses these to construct an image. Our eyes also have apertures: pupils. At night our pupils dilate, or get bigger, to let in more light—just like you may use large apertures in low light to maximize the amount of light gathered by the camera. But, that’s largely where the similarities stop. While cameras have a shutter speed, our eyes do not. Cameras are able to shoot an image with an exposure of 10, 20, or 30 seconds. This allows the sensor to be exposed to tons of light and allows more light particles (photons) to be recorded by the sensor. Eyes take in a certain number of images per second that can be processed by our brain—akin to a video “framerate.” If you’ve ever watched a movie in a theater, then you’ve most likely watched a movie at 24 or 30 frames (images) per second (24 or 30 Hz). Your eyes record what you see with a framerate anywhere from 50-90 Hz. Cameras have a setting called ISO that allows them to amplify very low amounts of light. Your eyes do not. Camera settings are something we can adjust while our eyes are controlled by reflexes, and most people can’t control how wide their pupils are or how “fast” they capture images. Camera settings allow for more flexibility in how an image is produced and how it looks.
What sees aurora better? Cameras or eyes?

Comparison of camera and naked-eye (simulated) views of the northern lights.
Auroras captured by cameras are typically more vibrant and colorful than how you would see them yourself. Cameras can collect many more photons than our eyes can, and this increased signal also means better color fidelity, structure, sharpness, and detail in the aurora. Cameras also don’t experience the loss of color at night that eyes do. Remember that at night in extreme low light, the cones in our eyes turn off and we only see with our rods. In contrast, a digital camera’s sensor can record photons, even very tiny amounts, meaning that the faintest of colors can be perceived by cameras. They are able to capture more details in the aurora and more colors in the aurora, even sometimes seeing reds and pinks that are invisible to us.
Knowing this, while auroras seen by the unaided eye may not have the same vibrant colors and detailed structures as in photos, witnessing them in person can provide a much different experience. Fast-moving structures in the aurora are hard to pick up in longer exposure photos. Seeing the motion of auroras with the naked eye is often exciting for new aurora chasers, who are used to viewing static images.
Real-time video of the aurora from one of my flighs from Seattle to Fairbanks.
The biggest disadvantage to using a camera is that after you press the shutter button or start the video, the settings you, the photographer, chose dictate how the aurora is captured. Especially during intense periods of a display, the aurora can change rapidly. While photos may capture more light or vibrant colors, they are still based on settings you select, predicting what the next moment may bring. By contrast, our eyes have the ability to endlessly and seamlessly adjust from one moment to the next, providing a very different experience when it comes to the overall progression of aurora structure, brightness, intensity, and even color. Auroras are amazingly beautiful, and cameras can’t fully capture the overall experience of witnessing them in person; the overwhelming emotion, feeling, and atmosphere of witnessing nature’s greatest light snow.
So, is aurora really green, or is it just “photoshop?”
Yes, the aurora is green, but our eyes just aren’t that good at seeing in low light. The way cameras work is inherently different from the way our eyes see - long exposure photos can reveal details in the aurora that are there but aren’t easily seen with our wimpy rods and cones. PIxels on a camera sensor are far better at detecting photons and can extract the faintest colors in the sky.

Naked eye representation of how I see the aurora.
Remember that seeing colors in the aurora is not the only beautiful thing about experiencing the lights, and given that it can be rare to see vivid green, red, blue, and purple colors, seeing them makes it even more special and unique. The structure, movement, and dynamic behavior of the aurora is really what captivates me, though, and these are qualities that can’t be communicated in photos. Under an active sky, the aurora truly does feel “alive” in a way, shifting, writhing, and twisting around you. Photos freeze that motion and strip away the mystique. Seeing the aurora in person is always better than looking at a photo, and especially when you see a full-blown auroral substorm, your jaw will be on the ground with awe and excitement.

Camera view of a very pink aurora in Fairbanks, Alaska.


3 comments
Question. If your night vision is activated at night, which reduces the amount of color that you see, why can we see the colors of the Aurora during the event, in the pictures that we take?
Thank you for the time you spend educating and preparing us to see the Aurora in all its glory. An experience everyone should have. I have downloaded your books and plan on using them this fall in Fairbanks. Your passion is inspiring, looking forward to watching your bright future unfold. Thanks again!
Thank you for taking time to explain auroras, & the difference in the colors we see. I’m definitely glad I got your book and took it with me, I carried it everywhere and read enough I could point out to my kids. Your description of “emotional” is dead on, I have never experienced anything like the aurora. I knew I always wanted to see them, but wow they sure outdid my expectations! Thanks for all you do! It makes a difference!