#1 Aperture

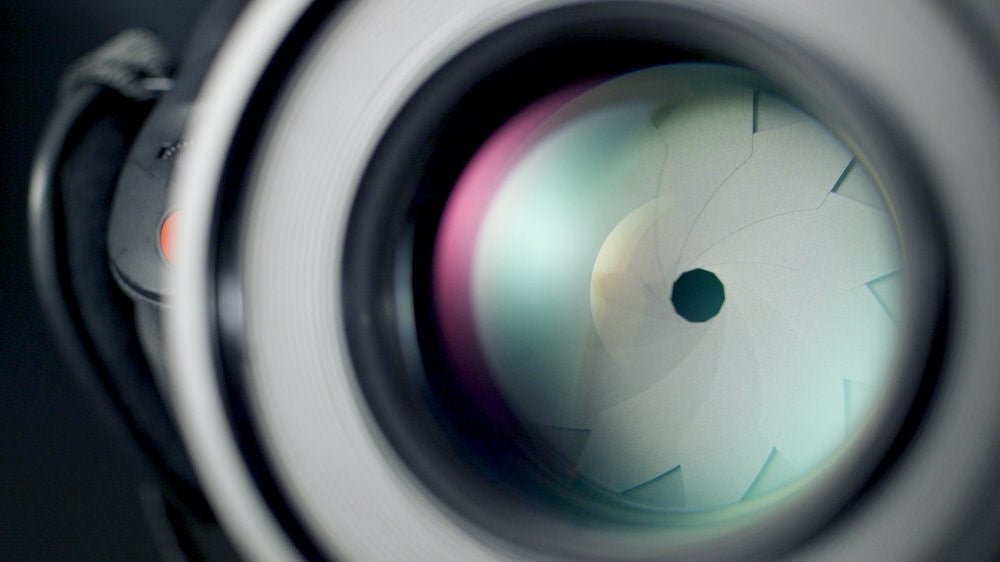
Aperture is defined as the diameter of the entrance pupil of the lens through which light travels into the camera. All camera lenses contain diaphragm blades arranged in a circle forming a central hole inside of the lens, the aperture. Either through the camera’s electronics or through a physical slider on the lens, these blades can be moved to either constrict or expand the aperture. Because the lens’ job is to gather and focus light onto the camera’s sensor, adjusting the size of the opening through which the light passes therefore adjusts how much light ends up hitting the camera sensor. Increasing the size of the aperture means the opening inside the lens becomes larger, allowing more light to pass through into the camera. Conversely, decreasing the size of the aperture, therefore, decreasing the opening inside the lens, allows less light to pass through into the camera.
Thinking of an analogy can sometimes help us understand what is really happening. For example, consider water flowing through a garden hose into a well. The water represents light, the garden hose represents the lens, the opening of the hose is the lens’ aperture, and the well is a pixel on the camera’s sensor. As the width of the garden hose increases, more water is able to flow through the hose into the well. When the hose’s opening decreases, the amount of water flowing out of the hose also decreases, and the well receives less water. This phenomenon is the same with light, a lens’ aperture, and exposure on a camera sensor. As the aperture is made larger, more light is allowed to “flow” through and the sensor becomes more exposed. When the aperture is made smaller, less light is allowed to “flow” through and the sensor becomes less exposed. An important disclaimer of this analogy is that, unlike a hose, light doesn’t get “faster” as it is forced through a smaller opening. You would expect the rate of water flowing through a hose to increase if its opening were constricted, but light follows the cosmic speed limit, c.
Adjusting the aperture doesn’t just change the amount of light reaching the camera, though. Aperture also controls a host of other variables that can affect photos, like depth of field, sharpness, vignetting, diffraction, aberrations, sunstars, and the bokeh of out-of-focus areas. I will be giving each of those terms separate attention.
#2 Focal Ratio

The focal ratio is a measurement photographers use to describe the size of a lens’ aperture. Technically, it is the value produced when the focal length of the lens is divided by the diameter of the entrance pupil (the aperture) of the lens, resulting in a dimensionless ratio known as the focal ratio. Oftentimes, the terms “f-number” and “f-stop” are used in reference to the focal ratio. I try and always use the term “f-number,” because I think it is the least confusing interpretation of the focal ratio term.
In regard to the relationship between the f-number and the aperture size, higher f-numbers correspond to smaller apertures, while lower f-numbers correspond to larger apertures. This relationship is counter-intuitive, and it often confuses photographers, so take some time to commit this rule to memory. Due to the properties of lenses and their apertures, increasing f-number also increases the depth of field, decreases the light transmission into the camera (decreasing exposure), decreases vignetting, increases sharpness (up to around f/4 to f/8 for most lenses), and increases diffraction. Decreasing the f-number then predictably decreases the depth of field, increases the light transmission (increasing exposure), increases vignetting, decreases sharpness (below f8 to f4 for most lenses), and decreases diffraction.
It should also be noted that extremely low f-numbers, usually f/1.4 to f/2.8, are considered “fast apertures,” or “bright apertures,” and lenses with these wide maximum apertures are known to be “fast lenses” or “bright lenses.” Higher f-numbers are then known as “slow apertures,” and lenses with smaller maximum apertures are known to be “slow lenses.”
Another colloquialism used by photographers is the phrase “stop down” when referring to adjusting a lens’ f-number. “Stopping down a lens” refers to increasing the f-number, thereby decreasing the size of the lens’ aperture. “Opening up” a lens means just the opposite—making the lens’ aperture larger.
#3 Focal Length

Without getting too technical, the focal length is the distance from the point at which all light rays converge inside a lens (the lens’ nodal point) to the camera’s focal plane (a digital sensor or film strip), and it’s usually measured in millimeters (mm). Because focal length is a measure of distance, high values are considered to be “long” focal lengths while small values are considered to be “short” focal lengths. Lenses are sometimes described as either “long” or “short” based on their focal lengths. For example, a 10 mm lens is considered to be a short lens while a 300 mm lens is considered to be a long lens. The longer the focal length, the smaller the field of view will be visible, meaning that long lenses are “zoomed in” while short lenses are “zoomed out.” This makes short lenses anywhere from 10-50 mm great for landscape or architectural photography and long lenses, typically those >50 mm great for portraits, sports, and wildlife. 50 mm lenses are sometimes called “standard” focal length lenses because their field of view is most like that of our own eyes. The focal length of a lens is an intrinsic property and does not change from camera to camera, even with crop factor. The idea that a lens’ focal length changes as a function of crop factor is a large misconception in photography. From camera to camera, the only parameter that changes about a lens is the field of view the camera can see through it. If you imagine each lens outputting light in an image circle, the area of that image circle the full-frame-sensor camera can “use” to produce an image is simply larger than the crop-sensor camera. The same amount of light reaches the full-frame sensor as the crop sensor, and since exposure is light per unit area, the exposure stays the same as well.
#4 Depth of Field

Depth of field is the distance from the nearest and furthest objects that are determined to be in focus by your camera. The depth of field is mainly dependent on the f-number you use when shooting. As mentioned before, lower f-numbers decrease your depth of field while higher f-numbers increase your depth of field. This is why apertures like f/1.4 are ideal for portrait photography while apertures around f/8 are suitable for landscapes. To get the background-blurring effect, a shallow depth of field is necessary, requiring a low f-number, while landscapes benefit from a deep depth of field, requiring a high f-number.
Depth of field also varies with subject distance. If the subject of your image is far away from the camera, the depth of field while focusing on that subject will be greater than if that subject were placed close to the lens. This is one reason why macro lenses often have such shallow depths of field at their minimum focusing distances.
It should also be said that the depth of field of an image also varies with sensor size. Because the field of view of the lens changes with sensor size, in order to achieve the same perspective as a full-frame camera on a crop-sensor camera, one needs to physically move further away from the subject, which increases the depth of field. Because objects further from the camera naturally result in more depth of field at that location, given the same f-number and size of the object relative to the image frame, a crop-sensor camera will produce images with less background blur. This is why on some photography sites you may see an “equivalent aperture” calculator along with an equivalent focal length calculator when using lenses on crop-sensor cameras. Because of the phenomenon outlined above, crop-sensor cameras need to use progressively larger apertures to maintain the same depth of field. This “equivalent aperture” logic is a bit of a slippery slope, though, since many photographers start thinking a full-frame lens on a crop-sensor camera is somehow a different lens with different a light output or a different focal length. Swapping a lens from one camera to another does NOTHING to the light coming out the back or the physical structure of the lens.
#5 Bokeh

Bokeh is defined as the aesthetic quality of the out-of-focus areas produced by a lens. Technically, it is not the actual background blur but rather a description of how it looks, so saying that “the bokeh of lens A is better than lens B” is incorrect while saying “the bokeh of the out-of-focus areas of lens A is better than the bokeh of the out-of-focus areas of lens B” is correct. Some technical photographers get mad about this minor semantic nuance, but personally, both uses of bokeh make sense to me, and even as a technical person myself, I often use the wrong form of bokeh, so I don’t think it’s a big deal. That being said, the bokeh of out-of-focus point sources of light is largely a subjective determination, but many cite “onion-ring bokeh” or “cat’s eye bokeh” as examples of poor performance. Objectively, having a lens with many aperture blades as well as them being rounded aperture blades means out of focus areas will be rendered smoother and possibly more pleasing. Lenses with extra-low dispersion (ED) glass elements also tend to have smoother bokeh since those glass elements aim to reduce ghosting, flaring, and chromatic aberration.
#6 T-Stops

Unlike f-stops which measure the physical size of an aperture opening, t-stops measure the light transmission through that aperture. Due to variations in optical construction, many lenses do not transmit the same amount of light for a given f-number. Because f-number is a physical representation of aperture size but also references light transmission, these variations can cause problems for photographers who need to match light exposures between lenses, a common occurrence in videography. Enter the t-stop. T-stops are very much like f-numbers, or “f-stops,” in that they use the principle of lens aperture, but instead of a general measurement of the size of the opening in the lens, t-stops specifically measure light transmission. Typically, t-stops are only referenced on cinema lenses, where exposure matching is extremely important, but it is possible to find the t-stop properties for consumer lenses on websites like dxomark. For general consumers, light transmission can be an important consideration when buying a lens specifically for its light-gathering ability. Buying a lens with a maximum aperture of f/1.4 for its bright optic may really only have a maximum t-stop value of t1.9, while another may have a maximum t-stop value of t1.5. The t1.5 lens gathers twice as much light as the t1.9 lens, even though both have a maximum f-number of f/1.4, so it is very important to check and see how your lens performs in this category and whether there is a discrepancy between its maximum f-number and maximum t-stop.
#7 Shutter Speed
Shutter speed is defined as the length of time the shutter of the camera stays open, allowing light from the lens to illuminate the focal plane (digital sensor or film). Shorter shutter speeds mean the sensor is not physically exposed to as much incoming light, reducing the exposure of the final image. Conversely, longer shutter speeds mean the sensor records more light, increasing overall image exposure. Shutter speeds are important to control not only to adjust the image exposure but to control the amount of motion blur in an image. When the shutter opens and exposes the sensor to light, during the time it is open, subjects moving across the field of view will blur as the light reflected from the subject into the lens changes with the subject’s motion. Because of this effect, shorter shutter speeds result in less overall motion blur than longer shutter speeds. The amount of motion blur you will expect in your photo will not only depend on the subject you are shooting but also on the lens and camera you use because motion blur caused by camera shake can become a noticeable issue at longer shutter speeds.
It should also be said that shutter speeds are typically measured in fractions of a second or whole second interval. Most cameras are limited to 30-second maximum shutter speeds and 1/8000-second minimum shutter speeds, but with some electronic shutters, shutter speeds up to 1/20000 second are allowed. You can extend your maximum shutter speed length, which is useful when taking very long exposures for landscape or astrophotography, with a shutter release cable or intervalometer.
#8 Exposure

Exposure is one of the most important photographic terms to understand. Exposure is defined as the amount of light per unit area reaching the focal plane (digital sensor or film). You may have heard that the three camera settings controlling exposure are aperture, shutter speed, and ISO, but in reality, only aperture and shutter speed play a role. This is because the exposure has to do with the physical amount of light reaching the camera, and as I will explain later, ISO does not directly control the amount of light being gathered by the camera. Also, since exposure is light per unit area, strictly adjusting sensor size will not increase the exposure of an image.
Take for example the Nikon D500, a crop-sensor camera and the Nikon D850, a full-frame-sensor camera. Interestingly, the Nikon D500’s sensor acts almost as if the D850’s sensor had been trimmed down to fit an APS-C-sized area. While the resolution of the D500 may be 20.9 megapixels compared to the D850’s 45.7 megapixels, if you look at the sizes of the sensors, each pixel takes up the same amount of space, so the amount of light each pixel can hold is the same. This means that for any given camera settings and using identical lenses, the D500 and D850 will have the same exposure.
How about the Sony a6500, a crop-sensor camera and the Sony a7s ii, a full-frame camera? The Sony a6500 has 24.2 megapixels while the Sony a7s ii has 12.0 megapixels, and because those 12 megapixels are spread out over a full-frame sensor while the 24.2 megapixels are spread out over a crop sensor, the Sony a7s ii has more light-gathering ability. With identical settings on each camera, the Sony a7s ii will always look brighter, because each pixel (unit area), is receiving more light, since they are physically larger than on the Sony a6500.
Many times photographers look at examples like the Sony camera and draw the conclusion that the larger sensor is what’s causing the increased exposure, but really, it is the larger pixels that are gathering more light, and examples like the two Nikon cameras show that given the same pixel density, the exposure for larger sensors will be the same as smaller sensors.
Furthermore, professional light meters that are used to calculate the correct camera settings for given light conditions have no dial, button, or setting for sensor size. The only things affecting exposure for a light meter is the physical amount of light in the environment, the shutter speed used by the camera, and the aperture used on the lens.
#9 Long Exposure

A long exposure is simply an image produced with a longer-than-average shutter speed. Long exposures are mainly used to create motion-blur effects for slowly-moving subjects like clouds, cars, waves, or stars. Long exposures can be made with a normal camera and lens, but owning an ND-filter can allow for long shutter speeds to be used in the daytime without overexposing the image (e.g., using a 30-second exposure in the daytime). Furthermore, using shutter speeds longer than 30 seconds, which is the shutter speed limit on most cameras, will require an external shutter trigger in some form. Long exposures are a great way to creatively use motion blur to create compelling images!
#10 Exposure Triangle
The exposure triangle is a popular way of associating the three adjustable camera settings in photography: aperture, shutter speed, and ISO. It describes the “push-pull” nature of camera settings, meaning that in order to maintain the same brightness of a photo, if you let’s say raise the ISO, you then need to lower the shutter speed, increase the f-number, or both. The relationships it implies are correct, but the word "exposure” used to describe it is not. This is because ISO does not affect camera exposure, and because of this, the exposure triangle should be renamed the “brightness triangle.” This is perhaps not adequate either, though, because adjusting ISO while subsequently adjusting shutter speed or aperture to maintain the same image brightness will affect exposure.
#11 ISO

ISO is the most elusive and misconstrued photographic subject. Many misconceptions exist surrounding ISO, most rooted in the days of film or incorrect science, leading photographers to make decisions about camera settings that may not lead to the best image quality. First, what is ISO? ISO is the amplification of sensor data after an image has been captured. If the light signal captured by the sensor is not adequate to produce a properly brightened picture, the ISO value may be raised to amplify the signal to a proper brightness. Notice how I said brightened instead of exposed? That’s because ISO is not equivalent to exposure in any way. The biggest misconception surrounding ISO is that somehow raising ISO raises the “sensitivity” of the image sensor. If you just think about it for two seconds, you realize this is complete nonsense. How is it possible that a silicon wafer in your camera can change its physical properties on a whim to make itself more or less photosensitive? Thankfully, it’s not. The sensor on your camera has a fixed sensitivity that can’t be manipulated in any way. Another misconception is that adjusting ISO adjusts the exposure of your image. Since exposure can only change if the physical amount of light entering the camera changes, ISO having no effect on the sensitivity on the image sensor means that adjusting ISO does not adjust exposure.
Going back to the notion that ISO is merely image amplification, on some cameras, ISO is almost meaningless. This is because in principle, raising ISO is the same as increasing the exposure slider in Lightroom. In both cases, the original image data is amplified and the brightness of the image changes. In Lightroom, there is no way to somehow add or subtract exposure: that would mean you could magically recover blown highlights or clipped shadows. Adjusting the highlight and shadow sliders only increases the brightness of the respective tonal ranges, and anyone who has tried to recover an image with drastically blown-out highlights will tell you that it’s impossible to get the full amount of data back from those pixels. On some cameras, ISO works in this same way, and since raising ISO can actually decrease the dynamic range of your camera sensor, it might be advantageous to shoot all your photos at the base ISO and raise the brightness in Lightroom with the exposure slider afterwards. On some cameras, though, this method doesn’t pan out and egregious banding issues arise, so test your camera to see if this will work for you.
The last major misconception is that increasing ISO increases noise. Given the same shutter speed and aperture values, raising ISO will only cause the image to brighten, and while the brightening of the image may make the pre-existing noise more visible, it will not change the amount of noise in the image. If you lowered the brightness of the image using the exposure slider in Lightroom, you would see that the brightness and noise values would be identical. If you were to increase ISO with the goal of maintaining the same image brightness, which would cause an equal and opposite change in either the shutter speed and/or aperture, then you would see increased noise. This is because when the shutter speed and/or aperture were adjusted, the physical amount of light reaching the focal plane also changed, and this exposure change will also change the amount of noise in the photo. If two images with identical brightnesses were recorded with different exposures, one will have more noise than the other because the lower signal image along with its noise will be amplified more than the higher signal image that doesn’t need as much amplification. When any light is amplified by a high ISO, the good light data and the bad noise data are amplified together, which is why, for example, a high ISO shot at a short shutter speed will show more noise than a low ISO shot with a long shutter speed.
To sum everything up,
- Sensors have one inherent sensitivity and ISO has no effect on this property.
- Changing ISO independently of any other camera settings will not change exposure, but it will change the BRIGHTNESS.
- Increasing ISO decreases dynamic range.
- If ISO is changed while image brightness is maintained, exposure WILL change due to the aperture and/or shutter speed changing.
- Some cameras are “ISO-less” or “ISO Invariant” which means that changing ISO in-camera will look the same as using the “exposure” slider in Lightroom (or another RAW editor). In this case, it’s best to shoot all images at the base ISO and brighten in post (e.g., with the Lightroom “exposure” slider).
#12 Brightness

Brightness was explained pretty well in the ISO section, but I thought I would give it its own attention because it’s so important to understand. Brightness refers to the “look” of an image, or basically, how bright or dark an image appears to the viewer. This is different from exposure, since brightness can be adjusted after the image is captured unlike exposure, which is a fixed amount of signal captured by the camera. This distinction is important in photography since ISO, one of the three “pillars” of digital photography, can alter the brightness of image but not the exposure (when adjusted independently of other settings). Changing brightness is the same as changing the amplification of image data: no new data are created; they are only altered.
#13 Signal-to-Noise Ratio

Signal-to-noise ratio (SNR) was another topic used to describe ISO, but I deemed it important enough to be given an entire section to itself. Understanding SNR is a crucial step in realizing how digital photos are created. The term signal-to-noise ratio describes the amount of light data gathered in a photo compared to the amount of noise gathered. A low SNR means that there is a low amount of signal compared to the noise, and this is generally worse than having a high SNR, which indicates the signal is large compared to the noise. If the signal is light, then what is the noise?
In digital photography, noise in photos can come from many sources. One source is heat or thermal noise. Thermal noise affects the camera’s internal electronics with higher temperatures increasing the agitation of electrons flowing in the camera as the image is captured and converted to a digital signal. Thermal noise is a major issue in photography, and for serious applications like astrophotography, the imaging chip is artificially cooled to reduce noise, sometimes even with liquid nitrogen. Even with no thermal noise, the analog-to-digital converter (ADC) inside the camera creates noise that can present in images, and this is often called ADC noise. ADC and thermal noise combined form the “read noise” that is present in all photos at zero seconds of exposure time. If you have ever encountered hot pixels or banding in your images, this is “read noise,” and if you are familiar with astrophotography, bias frame subtraction is a method to remove read noise.
The other type of noise is shot noise, and you can think of it as the fraction of all incoming light that is not usable information. Shot noise arises from the random variation of photons. This means that given a particular exposure and an even distribution of light across a scene, some parts of the sensor may end up with more or fewer photons than another part. The prevalence of this noise with exposure time follows something called a “Poisson distribution,” meaning that as more light is collected, the ratio of shot noise to usable data decreases. Think of this process as flipping a coin. It is known that flipping a coin gives a 50% chance of landing on either side, and if we say you flip a coin ten times and the pattern is T-T-T-T-H-T-T-T-H-T, there are 2 heads and 8 tails. Continuing this scenario, flip the coin ten more times and it becomes 8 heads and 12 tails, then ten more flips and the pattern becomes 13 heads and 17 tails until at 1000 flips the pattern is 505 heads and 495 tails. To start out, the 50% chance of heads vs. tails we expected was not what we saw, instead seeing 20% heads and 80% trails, but given 1000 flips, the gap became smaller, and the pattern became 50.5% heads to 49.5% tails. What we would expect is that given an infinite number of flips the ratio would be an exact 50/50 split between heads and tails. This entire coin flip analogy is actually very similar to how light is captured by a camera. Given a short exposure, the scene is not well represented, and the randomness of light manifests as shot noise. As the exposure is lengthened, the real pattern of light is revealed, and shot noise is buried in the real signal of the scene. In the real world, the distribution of light follows a certain “real” pattern, but without enough exposure time, this pattern won’t form entirely, resulting in inconsistencies that manifest in the form of noise. Most of the noise in photos is because of shot noise, and it’s the reason why photos with lower exposure levels amplified to the same brightness (low SNR) will have more noise than photos with higher exposure levels (high SNR).
ISO is a camera setting many don’t realize can affect SNR. If you have ever raised your ISO to capture fast action, decreasing your shutter speed in the process, then you have subsequently reduced your SNR. Using program modes that help your camera maintain a certain image brightness won’t guarantee an optimal SNR every time. Realizing that a good SNR is dependent on having adequate exposure levels will ensure you will maximize the quality of your photos. Of course, sometimes it’s necessary to decrease exposure to capture fast action or a deeper depth of field, but many don’t realize that doing so may increase the noise in the final image.
#14 Expose to the Right

Expose to the right (ETTR) is a shooting technique that attempts to maximize SNR. What ETTR refers to is practicing a shooting style where your histogram is shifted as far to the right as possible without any highlights being overexposed. This method may not produce the level of brightness you want in your final photo, but it will capture the maximum amount of light possible, giving your image increased detail and less noise. Most photographers are already using this method, but where I see this method most neglected is in portrait photography, where the photographer may create an exposure to match the model’s skin tone instead of one to maximize their light-gathering ability. The beauty of ETTR is that like all images, you can decrease the brightness in post and adjust it back to how you imagined the shot to look, so there’s no danger in using this technique. Of course, ETTR doesn’t work for some environments, but when you can, you should incorporate this technique into your photography.
#15 High Dynamic Range
High dynamic range (HDR) is a photographic technique that attempts to increase the dynamic range of an image by combining multiple images taken with different exposures. In many scenes, the light range from the lightest point to the darkest point is too much for any modern camera to capture effectively, so the dynamic range can be artificially extended by shooting multiple photos each exposed for a different part of the scene. For example, when shooting a harshly backlit scene, the dynamic range of the final photo can be enhanced by shooting two photos: one for the light background and one for the dark shadows. In Adobe Lightroom (or a similar editing program), it’s possible to blend these images into an HDR image with higher dynamic range than could be captured in one shot. This technique is most common in landscape photography, where the camera can be stationary on a tripod and alignment of the images can be made easier.
#16 RAW

RAW is a type of image format that allows for a lossless recording of image data. Photographers almost always shoot and work with RAW files because the light is unspoiled, uncompressed, and untouched by the camera. This allows for non-destructive editing and more freedom to tweak your photos. The alternative to shooting RAW is shooting JPEG files, which are smaller in size but compress the image data in a way where it’s harder to edit. RAW files give you a greater ability to manipulate tonal information and a higher chance of recovering highlights and shadows.
The entire process is analogous to baking a cake. If you take a photo, the light captured represents all the ingredients in the cake, and if you shoot RAW, you have the ability to bake the cake yourself in your own oven for however long you want at whatever temperature you please. Shooting JPEG, the camera does all the baking internally, and the cake it makes is, more or less, the cake you get. You might be able to add frosting or sprinkles, but underneath it’s a cake that the camera made and a cake that you can’t really change. If you like to bake your own cakes then shoot RAW files, and to be honest, I don’t see any valid reason for not shooting RAW. If you’re going to spend thousands of dollars on cameras, lenses, and the works, then shooting JPEG is just cheating yourself.
#17 Post-Production

Post-production is the term referring to any editing or manipulation of a photo after it has been taken. Post-production usually consists of basic edits in a raw processor such as Lightroom then possibly more work in Adobe Photoshop (or similar) making more fine tune adjustments or removing distracting elements. The way in which you edit your photos is often referred to as a “workflow,” and everyone has a different style. The way you post-process your photos can be a way to distinguish yourself and develop your style, so take some time to find your workflow.
#18 JPEG
JPEG is a type of lossy image file format. In photography, it is one of the two types of file formats able to be recorded by your camera, the other being RAW. Compared to RAW files, JPEGs take up less space, but they compress the image data into a lossy format, meaning that data is lost when the file is recorded. I do not recommend shooting JPEG unless you don’t want to edit your photos.
#19 Auto Mode
Auto mode is a setting on your camera that will automatically control your camera settings using the camera’s internal metering system to determine the right aperture, shutter speed, and ISO for any given shooting environment. In photography, there is nothing wrong with using auto mode, but using a program mode like aperture priority or shutter priority or even going full manual mode will let you control your camera better, which can make the creative process of photography easier. Auto mode is great if you are handing your camera to someone who is unfamiliar with photography or if you have zero time to fiddle with camera settings, but in general, I suggest at least trying to shoot in one of the program modes or in manual mode—it will make you a better photographer.
#20 Meter

The meter is your camera’s mechanism to detect light, using it to calculate the right settings for properly exposing an image. If you have ever used Auto ISO, Auto Mode, Aperture Priority, or Shutter Priority modes on your camera, then you have used the meter to calculate camera settings.
On most cameras, there are also metering “modes” that will analyze the light from a given scene. Each camera company gives each mode a different name, but almost all DSLR/mirrorless cameras have a spot metering and a zone metering function. In spot metering mode, the camera gives you a movable point which it will use to meter the light off of which is great if you have a hot spot in your scene. Zone metering will tell the camera to take the darkest and brightest parts of the image and find a “middle ground” that will expose for the midtones of the image.
Most of the time, the camera’s meter gets the settings right, and the final photo has the right amount of brightness and exposure for the scene, but other times, the meter may get confused if the lighting situation is complex, and in those situations it may be helpful to switch to manual mode.
#21 Auto ISO
Auto ISO is a toggle-able setting on your camera that, when enabled, will automatically adjust ISO to form an image with the proper brightness. I frequently use Auto ISO for day-to-night timelapses, and manual mode plus Auto ISO is one of the most versatile shooting techniques. Most times camera systems intelligently adjust ISO to maximize exposure through aperture and shutter speed, and I’ve personally never had an issue using this function.
#22 Shutter Priority
Shutter priority is one of two program modes often found on cameras and selecting it will force the camera to adjust the lens’ aperture based on a fixed shutter speed set by the user. Shutter priority is particularly useful when a certain shutter speed needs to be maintained to eliminate motion blur, a common practice in sports, action, or wildlife settings. Using shutter priority can be slightly problematic however, because as aperture is adjusted to meet certain lighting conditions, vignetting, sharpness, depth of field, and aberrations of the photo will all vary.
#23 Motion Blur

Motion blur is an effect in photography where the motion of an object being photographed causes it to become blurred in the final image. This effect is more pronounced using long shutter speeds or when shooting fast-moving objects. Motion blur can also be caused by a physical movement of the camera, from either camera shake or panning/tracking motions. Mitigation of motion blur is usually done by quickening the shutter speed (if the blur is caused by the subject) or enabling sensor and/or lens stabilization (if the blur is caused by camera shake).
#24 Aperture Priority
Aperture priority is the second program mode available on most DSLR and mirrorless cameras. Following the same structure as shutter priority, given a pre-selected aperture by the photographer, the camera will calculate the correct shutter speed for a well-exposed image. Aperture priority is, in my opinion, the most useful camera mode. Aperture controls the most important creative variable in photography: depth of field and the ability to adjust the depth of field easily while the camera does the rest is a powerful feature to be used. Portrait, wedding, landscape, macro, and street photography are the genres that most benefit from aperture priority since the aperture controls much of the creative look of the photo. Besides the depth of field, aperture size affects the sharpness, vignetting, and aberrations in a photo, so if your lens has a “sweet spot” aperture where image quality reaches a maximum, it’s helpful to lock in that setting and let the camera worry about shutter speed. Furthermore, for photographic genres excluding action and wildlife, subjects are usually not moving that fast, and since many lenses and even cameras now have internal stabilization, it’s less important to maintain a minimum hand-holdable shutter speed. Aperture priority is a great tool across photography offering a perfect balance of freedom and ease of use, and combining it with Auto ISO is a great option.
#25 Manual Mode

YOU MADE IT!
Hopefully, the explanations for those terms made sense, and if they didn’t, don’t be discouraged. Photography is not easy and it will take time to fully understand everything, but with a little effort and motivation, anyone can become an expert!
